3 Introduction to Quarto
Quarto is a free, open-source authoring framework that combines prose, executable code, and output (such as data visualization) in a cohesive document. Code can be written in several programming languages—including R, Python, and Julia—and is executed each time the document is rendered, so the output always reflects the latest versions of the data and code. Quarto can produce a wide range of file formats (e.g., HTML, PDF, and Microsoft Word) and supports various project types, such as websites, presentations, and books. In this book, we will author Quarto documents in Positron, which provides built-in support for editing, rendering, and previewing them. This chapter and the following two introduce the essential Quarto features used throughout this book.
This chapter provides a high-level introduction to Quarto:
- Section 3.1 demonstrates how to create a new, blank Quarto document using Positron.
- Section 3.2 outlines the general structure of a Quarto Markdown (QMD) file.
- Section 3.3 briefly describes the output formats supported by Quarto.
3.1 Creating a New Quarto Document
To start from a basic Quarto template, either create a new folder as described in Section 2.2.2 or open an existing one. Then create a new Quarto document using one of the following methods:
- Use the
File→New Filemenu or the shortcut. Then selectQuarto Documentfrom the dropdown. - Open the Command Palette using the shortcut, type “Quarto: New Quarto Document (qmd)”, and press .
To create a new Quarto document, go to File → New File → Quarto Document.
A new tab appears in the editor pane at the top left of the Positron window. At this point, the file contains only four lines, shown in Figure 3.1. These lines represent a minimal Quarto document: a header bracketed by two lines of three hyphens (---).
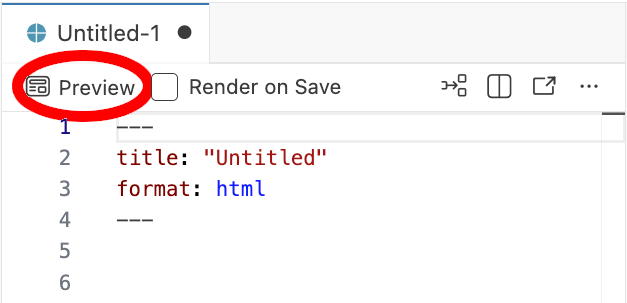
The header is written in YAML, a recursive acronym for “YAML Ain’t Markup Language.” Authoring Quarto documents does not require deep YAML knowledge. It suffices to know that each entry in a YAML header is a key-value pair separated by a colon. For instance, you can change the document’s title by editing the value of the title key. You can also add keys beyond title and format, such as author and date, for example:
---
title: "My First Quarto Document"
author: "Michael T. Gastner"
format: html
---
A comprehensive list of YAML keys and their possible values is available on the Quarto website.
The YAML header of a Quarto Markdown (QMD) file consists of key-value pairs in the format key: value.
You can save the current file using either the menu (File → Save) or the keyboard shortcut . When naming the file, the extension should be .qmd, which stands for “Quarto Markdown.”
QMD files have the extension .qmd.
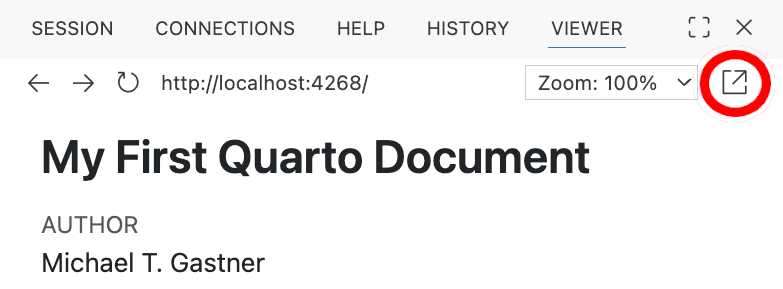
Next, click the “Preview” button in the toolbar above the editor pane (Figure 3.1). Alternatively, use the keyboard shortcut . Positron then renders the document and opens a viewer on the right, as shown in Figure 3.2. Clicking the “Open in Browser” button—an arrow pointing diagonally out of a rectangle—opens the rendered document in the default web browser.
The process of converting a QMD file to a reader-friendly format, such as HTML, is called rendering.
3.2 Structure of a Quarto Document
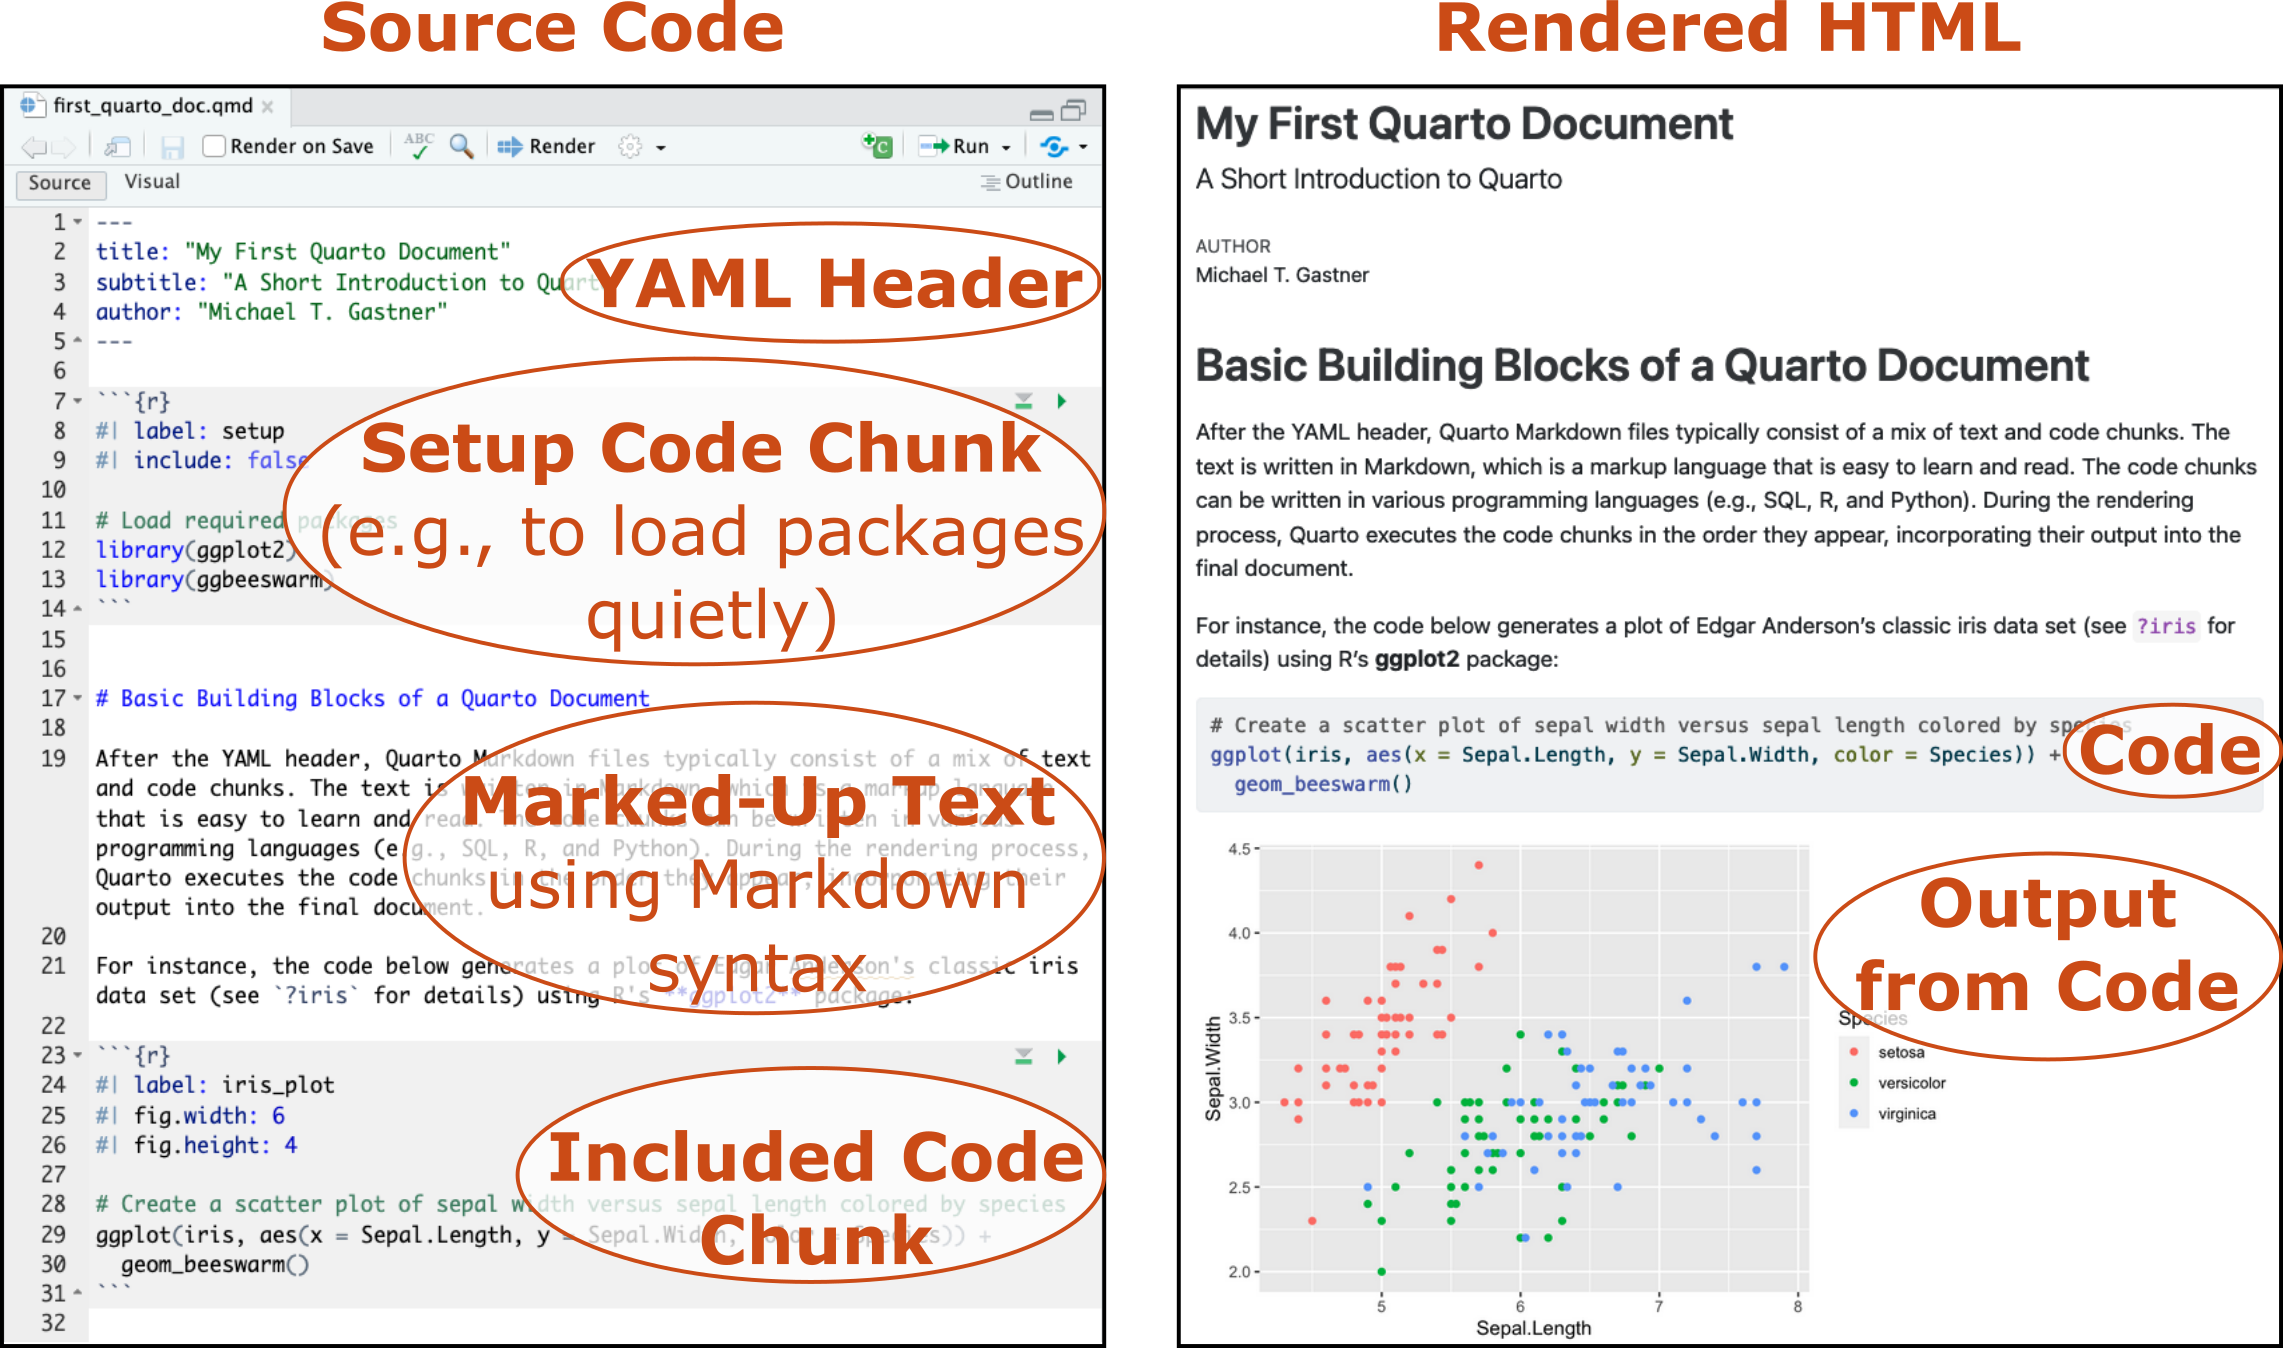
Below the YAML header, QMD files typically consist of a mixture of text and code cells, as illustrated in Figure 3.3. The text is written in Markdown, a markup language known for its simplicity and readability, which you will learn in Chapter 4. Code cells can be written in various programming languages, such as R, Python, and Julia. During rendering, Quarto executes the code cells in the order they appear, incorporating their results into a reader-friendly document. Depending on the options selected for each code cell, the rendered document may display the source code, the output, or both. Chapter 5 will introduce some of the available execution options.
QMD files contain a mixture of text, written in the Markdown language, and code cells.
3.3 Quarto Output Formats
You saw in Section 3.1 that the YAML header typically contains a format key. Positron’s default template uses html, which is sensible because HTML is a natural choice for sharing information on the web. HTML is also one of the most accessible formats: browsers allow adjustments to visual settings and integrate with assistive technologies such as screen readers. Additionally, Quarto’s default HTML template is responsive to different screen sizes, so the rendered document works well on both desktop and mobile devices.
Still, information is sometimes better delivered in non-HTML formats. Quarto can generate PDFs, Word documents, OpenDocument files, ePub books, and presentations (e.g., in RevealJS, PowerPoint, or Beamer formats). The Quarto documentation lists all supported formats.
Switching from one output format to another is as simple as changing the value of the format key in the YAML header. For example, to generate a PDF instead of an HTML document, change format: html to format: typst. The format is named after the typesetting system Typst, which Quarto uses to create PDFs. The typst format is a good choice for documents that will be printed or distributed as fixed-layout files because it produces high-quality typography.
To generate a PDF instead of an HTML document, change the value of the format key in the YAML header from html to typst.
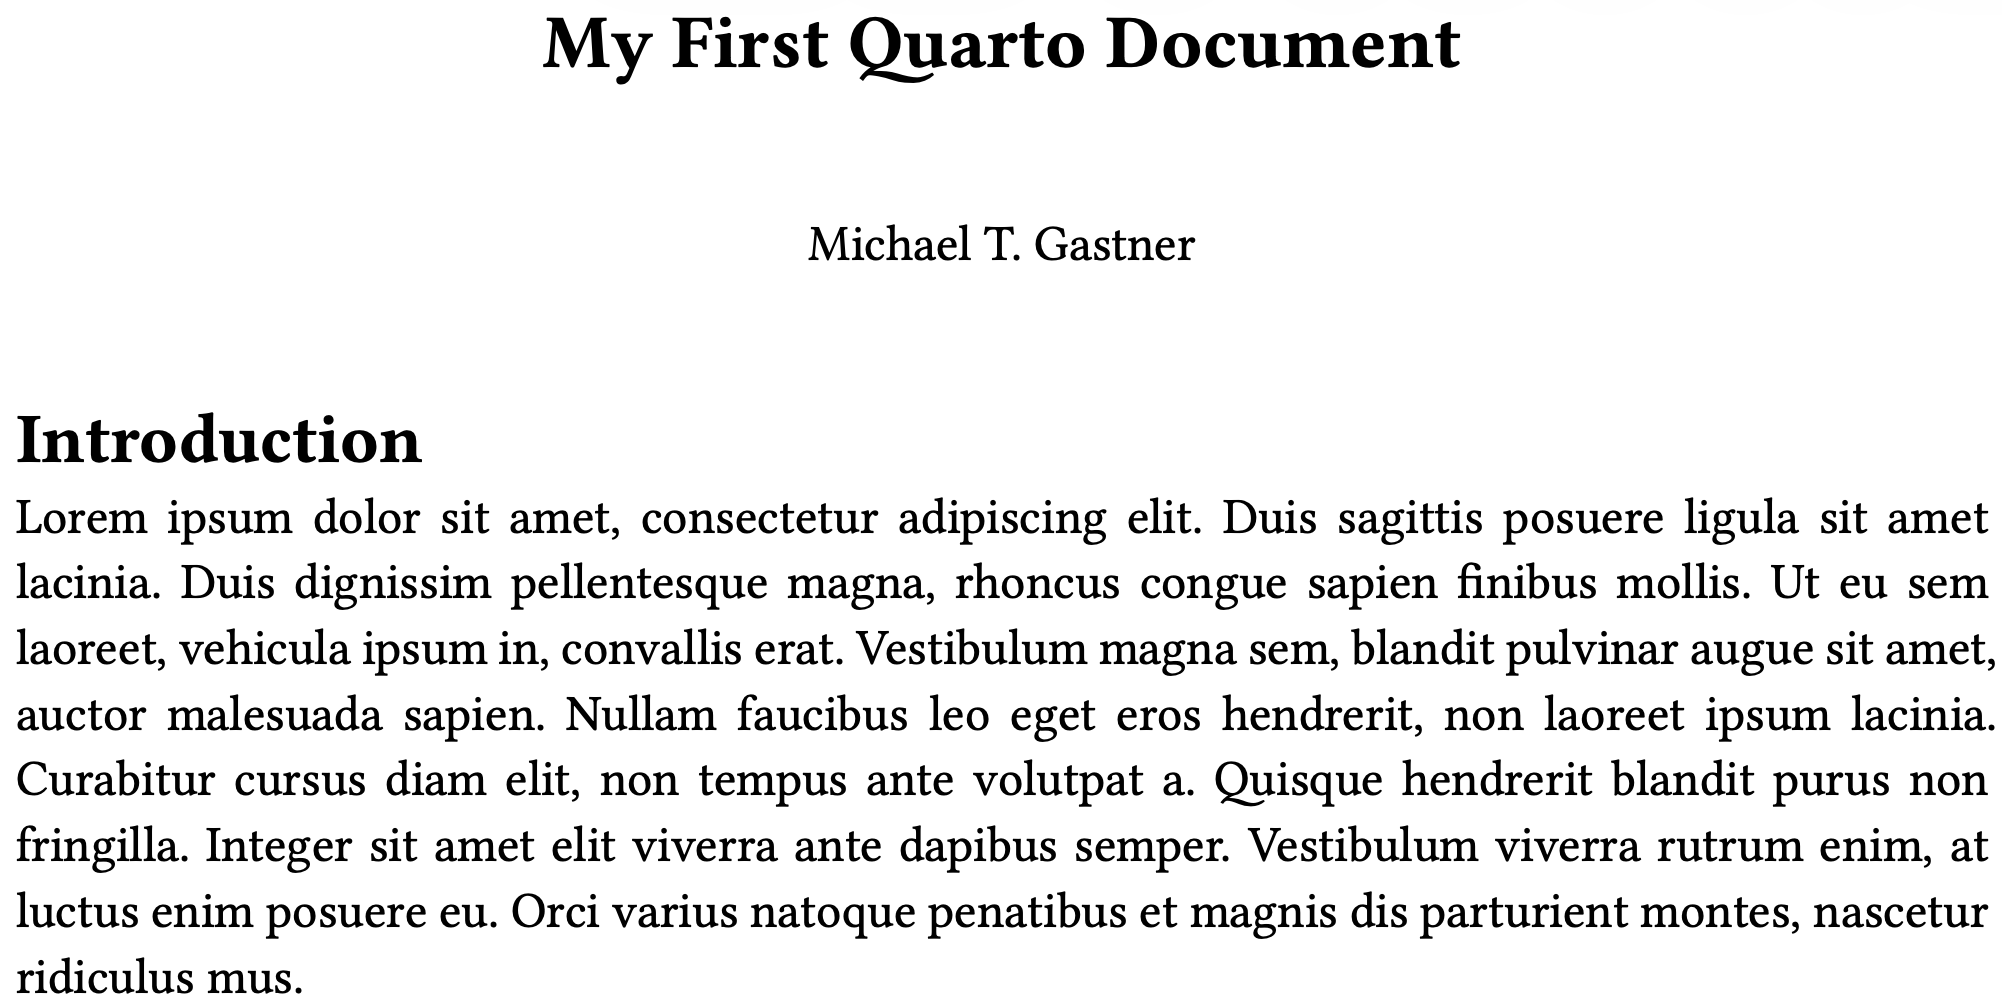
To test the PDF output format, you can use the following QMD file. After the YAML header, it contains three sections, with headings indicated by the # symbol. Each section contains one paragraph of placeholder text generated by Quarto’s built-in lipsum shortcode. Shortcodes are special commands that generate content when the document is rendered.1
---
title: "My First Quarto Document"
author: "Michael T. Gastner"
format: typst
---

# Introduction

{{< lipsum 1 >}}

# Methods

{{< lipsum 1 >}}

# Results

{{< lipsum 1 >}}
When you click Positron’s Preview button, the top of the rendered PDF should look like Figure 3.4.
One of Quarto’s strengths is its ability to render the same QMD file in multiple formats. For example, replace the YAML header with the following version to generate HTML, PDF, and Microsoft Word documents:
---
title: "My First Quarto Document"
author: "Michael T. Gastner"
format:
  html: default
  typst: default
  docx: default
---
To render the QMD file in all listed formats, open Positron’s Command Palette using the shortcut, type “Quarto: Render Document,” and select “Render All Declared Formats” from the dropdown. This command will create three files in the same folder as the QMD file, with the same base name but different extensions: .html, .pdf, and .docx.
Use “Quarto: Render Document” → “Render All Declared Formats” from the Command Palette to render a QMD file in all formats declared in the YAML header.
3.4 Conclusion
In this chapter, you have created and rendered a simple Quarto document in multiple formats. You have learned that Quarto documents contain a YAML header, plain text, and code cells. The next chapter explains how to write text in Markdown, which allows greater control over structure and formatting than the simple examples used here.
A complete list of Quarto shortcodes is available at https://quarto.org/docs/authoring/shortcodes.html.↩︎